
1. Never Paint Over Damaged or Unpatched Drywall
Even minor wall damage can ruin an otherwise clean paint job. Painters know that dents, cracks, and old nail holes show through fresh paint if not patched properly. Good wall surface preparation means taking the time to address these flaws before anything else.
Why Damaged Walls Cause Bigger Problems Later
- Paint Doesn’t Stick Evenly: When walls are chipped or cracked, paint soaks in unevenly and dries with blotches or shiny patches. These inconsistencies can make the surface look dirty or poorly done even if high-quality paint is used.
- Cracks Keep Growing Under Paint: Painting over a small crack might hide it for a while, but movement in the wall will reopen it quickly. Without proper wall repair before painting, that fresh coat won’t last and may start peeling in a few months.
- Blemishes Become More Noticeable: Light reflects off uneven areas and highlights every dip and bump. Instead of hiding damage, fresh paint can actually magnify flaws if patching walls before painting is skipped.
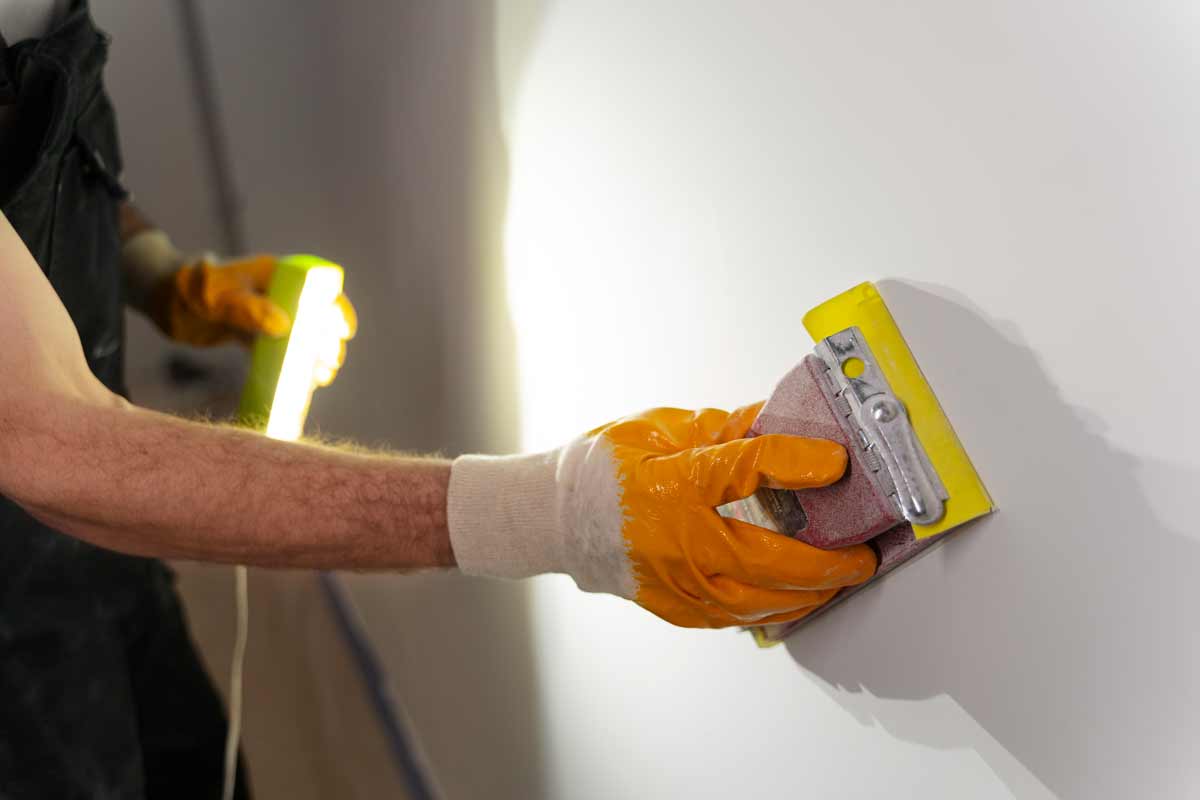
2. Patching Isn’t Enough Without Proper Sanding
Many think filling a hole is the last step, but that’s only half the job. Without proper sanding, walls stay uneven and textured, which leads to visible flaws once paint goes on. Painters always stress the importance of sanding patched walls before painting to get a truly smooth finish.
How Sanding Makes or Breaks the Final Result
- Uneven Patches Absorb Paint Differently: Rough or bumpy areas left un-sanded will grab more paint and dry darker, creating a patchy look. Proper wall surface preparation includes sanding everything flush so the color stays even.
- Sharp Edges Show Through Paint: When joint compound is applied, it often leaves ridges or edges around the patch. Sanding those down keeps the surface uniform and avoids shadows or highlights after painting.
- Dust Impacts Paint Adhesion: Failing to remove dust after sanding makes paint peel or bubble. Pros always clean thoroughly after sanding patched walls before painting to ensure the paint sticks like it should.
3. Smooth Walls Make Paint Look Better
Even if the paint is top quality, it won’t hide lumps, grooves, or leftover texture from patches. Southbury painters always focus on smoothing walls before applying paint to get that crisp, even finish. A wall that feels smooth to the touch looks better to the eye.
How Smooth Walls Improve Overall Appearance
- Light Reveals Flaws Instantly: Any uneven patch or bump will stand out when sunlight or interior lighting hits the wall. Smoothing walls before applying paint reduces these distractions and helps create a clean, uniform surface.
- Rollers and Brushes Perform Better: Paint tools glide more easily over a flat surface. If the wall is rough, paint goes on unevenly and may leave marks or streaks that ruin the final look.
- Textured Spots Trap More Paint: Rough areas grab more pigment and change how the color dries. Taking the time to smooth out the wall during wall surface preparation ensures a consistent color from corner to corner.
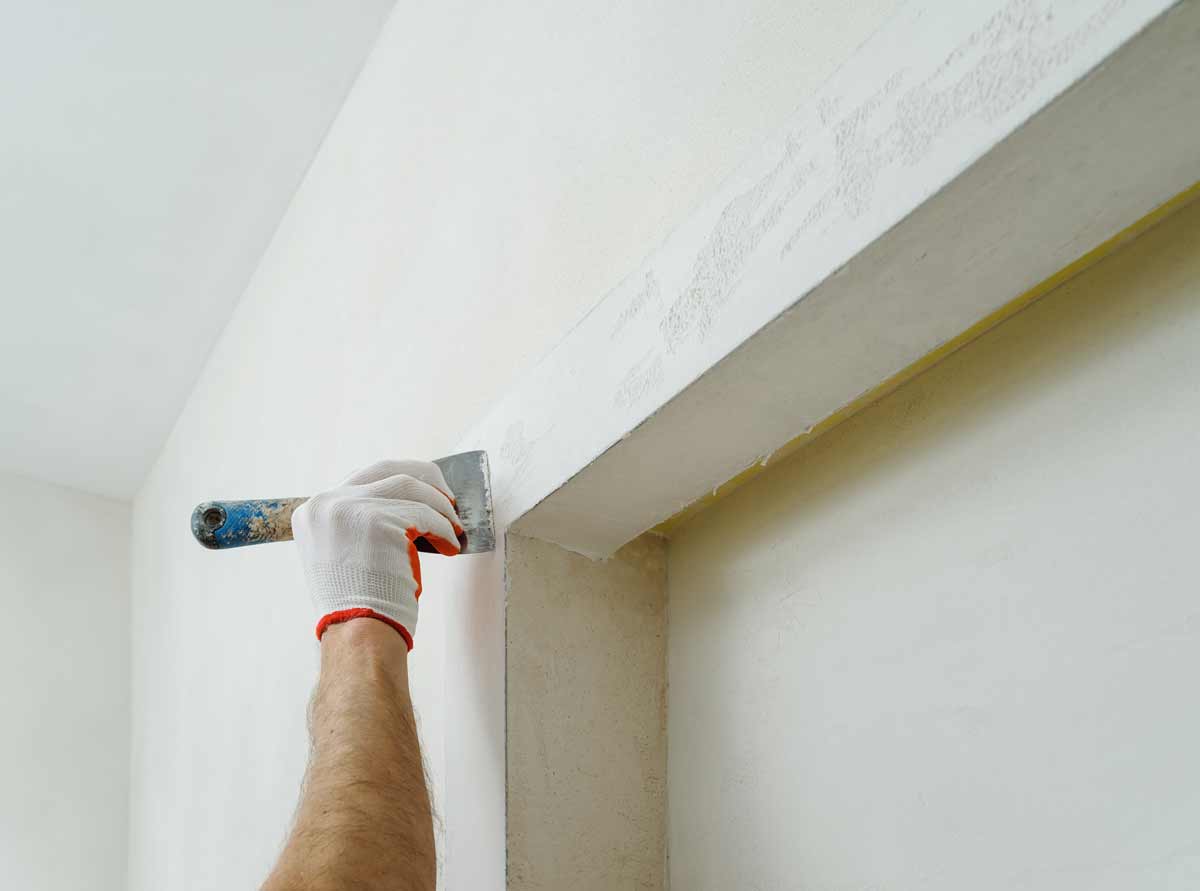
4. Skipping Primer Can Ruin a Perfect Patch Job
After the wall is patched and sanded, it’s not ready for paint just yet. Without primer, the paint won’t bond well to the patched areas and may appear uneven. Painters know that wall repair before painting isn’t finished until the primer has sealed the surface.
Why Primer Is a Key Step in Wall Prep
- Patches Soak Up Paint Differently: Joint compound is more porous than drywall, so it absorbs paint faster. Primer helps seal these spots and ensures paint goes on evenly across the whole wall.
- Stains and Discoloration Show Through: Water damage, smoke, or grease stains often bleed through paint unless blocked with primer. Southbury painters use stain-blocking primer to keep the finished surface clean and uniform.
- Paint Won’t Stick to Dust or Debris: Even after sanding patched walls before painting, dust can linger. Primer bonds better than paint alone and helps lock in any residue left behind after prepping.
5. Rushing the Process Leads to Poor Results
One of the most common mistakes painters see is rushing from patch to paint too quickly. Proper wall repair before painting takes time—the compound must dry fully, sanding must be thorough, and the primer must cure. Skipping steps or cutting corners often means the wall will need to be redone sooner than expected.
How Slowing Down Leads to a Better Finish
- Wet Compound Causes Paint to Bubble: If paint goes on before patches are dry, it can blister or peel. Pros wait until everything is dry, smooth, and primed to avoid problems.
- Sanding Before Drying Creates Rough Edges: Sanding a still-damp patch will tear the surface and make it harder to smooth later. This step is crucial to smoothing walls before applying paint and avoiding texture problems.
- Improper Timing Means Wasted Paint: Applying primer or paint too soon wastes materials and labor. Taking the right amount of time between each step in patching walls before painting protects the final result and saves money.
How to Identify Hidden Wall Damage That Needs Repair
The USD 5.1 billion drywall repair services market is projected to reach USD 10.22 billion by 2033, reflecting growing demand for quality wall prep and repair. Some wall issues are obvious—a hole from a doorknob or a nail pop—but Southbury, CT, painters often find that the worst problems are the ones homeowners don’t see right away.
Before patching walls before painting, it’s important to recognize signs of deeper damage that require proper wall repair before painting for a lasting finish.
1. Soft or Spongy Spots Under Pressure
If the drywall gives way slightly when pressed, that’s often a sign of moisture damage behind the wall. This could be from an old leak, poor ventilation, or trapped humidity. Before starting any wall surface preparation, painters recommend checking for soft areas and cutting them out if necessary.
2. Bubbling or Peeling Paint
Paint that blisters or peels usually means something underneath is affecting adhesion. Hidden moisture, poor previous prep, or failing drywall tape are often the cause. Instead of just sanding and repainting, professionals assess the root problem during wall repair before painting.
3. Yellow or Brown Stains on Drywall
Discoloration, especially near ceilings or corners, often signals past or current water leaks. Even if the area feels dry now, mold or weakened drywall could still be inside. Southbury painters always investigate stained areas thoroughly before patching walls before painting to ensure long-term stability.
4. Cracks That Reappear After Repair
Hairline cracks are common, but if they come back quickly, there could be movement in the framing or joint issues. Repeated patching without fixing the cause leads to more problems later. This is why a smart approach to wall surface preparation involves identifying structural patterns before applying compound.
5. Warped or Bulging Sections of Wall
A bowed or raised area may indicate issues behind the drywall, such as rotted studs or delaminated materials. These sections are often mistaken for cosmetic flaws but usually require deeper inspection. Southbury pros stress that smoothing walls before applying paint won’t help if the wall itself is unstable.
6. Musty Odors Coming from the Wall
Even if a wall looks clean, a musty smell could mean mold is growing inside. This often happens after unnoticed leaks or high humidity in basements and bathrooms. Before sanding patched walls before painting, painters recommend checking for lingering odors and inspecting inside if needed.
Preparing a Wall with Multiple Old Patches or Repairs
The average cost of drywall repair is $608, with most projects ranging between $294 and $924—making it worth doing right the first time. Older walls often have a mix of past fixes—some done well, others not so much—so painters take extra care when preparing these surfaces. Before patching walls before painting again, it’s essential to properly address old repairs to avoid a lumpy or uneven finish.
1. Check for Loose or Flaking Patch Material
Old patchwork can dry out and detach from the wall, especially if it wasn’t sanded or primed correctly. Tap gently around previous patches to check for hollow sounds or movement. Any loose material must be scraped out and re-done as part of responsible wall repair before painting.
2. Level Uneven Compound Build-Up
Overlapping patches often leave high spots and ridges that show through paint. Use a sanding pole or drywall sander to feather these edges into the surrounding wall. Sanding patched walls before painting helps avoid visible mounds and creates a smooth surface for fresh coats.
3. Prime Over Discolored or Stained Areas
Stains from old repairs can bleed through new paint if not treated first. Use a stain-blocking primer on watermarks, smoke damage, or yellowed patches to seal them completely. This is an essential part of wall surface preparation, especially for walls with a long history of fixes.
4. Blend Multiple Patches into One Smooth Area
Instead of touching up each spot individually, it’s often better to skim coat the entire section. This evens out the surface and helps with smoothing walls before applying paint. A wide drywall knife and a light hand help feather the edges across large areas.
5. Watch for Texture Differences Between Old and New Repairs
Different materials and techniques used in the past may leave inconsistent textures. Use a sanding sponge to smooth rougher areas or apply a new texture across the entire wall to unify the look. This step ensures that patching walls before painting doesn’t result in a patchy final appearance.
6. Reassess the Wall After the First Sanding Pass
After the first round of sanding, flaws often become more visible—ridges, dips, or tool marks that weren’t obvious before. Painters recommend re-lighting the wall from different angles and making additional touch-ups if needed. Thorough wall repair before painting sometimes requires multiple passes to get it right.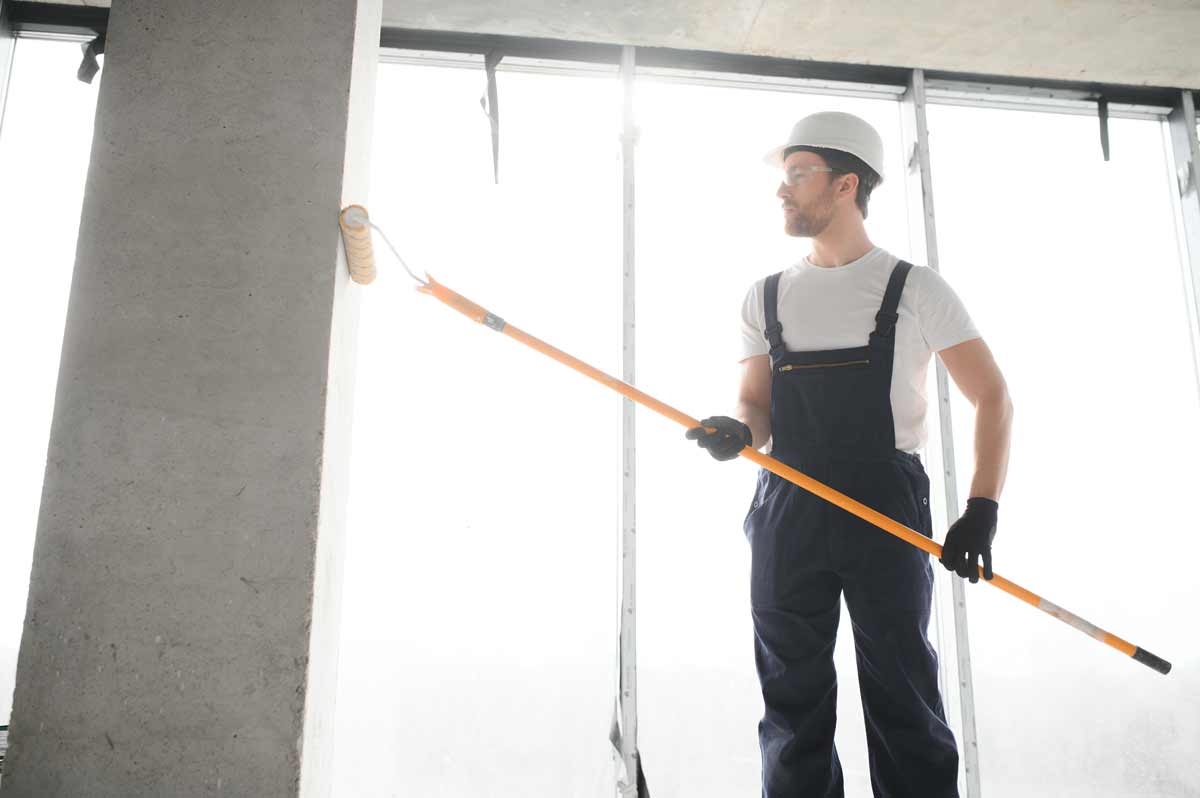
How to Choose the Right Contractor for Wall Repairs and Painting
Choosing the right contractor can make or break a paint job—especially when patching walls before painting is involved. Homeowners in Southbury, CT, often find that quality prep work is what separates professional results from rushed, uneven finishes. A contractor who understands wall surface preparation, not just painting, ensures that every patch blends smoothly and holds up over time.
1. Look for Experience in Drywall Repair, Not Just Painting
Some painters know how to apply color well but struggle with damaged walls. Look for contractors who specialize in wall repair before painting and can demonstrate patching, taping, and sanding skills. Ask about their process for smoothing walls before applying paint, especially in older homes with imperfections.
2. Ask to See Before-and-After Photos of Past Projects
Photos reveal how well a contractor blends patches into existing surfaces. Look for signs of proper wall surface preparation—no visible bumps, seams, or flashing around repaired areas. This helps ensure they understand every step, from compound to primer to final coat.
3. Get Details on Patching and Sanding Process
Professionals should clearly explain how they handle holes, cracks, and seams. Ask if they use joint compound, how they sand it, and when they prime. Contractors who mention sanding patched walls before painting and sealing with primer are more likely to deliver lasting results.
4. Confirm Use of the Right Tools and Materials
Cheap materials can ruin even the best technique. Reliable contractors use high-quality compounds, sanding blocks, dust extractors, and primer designed for drywall. A solid understanding of proper patching walls before painting shows in their attention to detail and choice of tools.
5. Check Reviews That Mention Clean Prep Work
Online reviews often highlight whether a painter kept dust under control or left patches rough. Look for praise around prep, not just color. Comments that mention wall surface preparation and smooth finishes are a sign the contractor takes their time to do the job right.
6. Ask About Timelines and Drying Schedules
Professional wall prep takes time to dry, sand, and prime between steps. Rushed contractors may skip key stages like sanding patched walls before painting or allow paint on top of damp compound. Choose someone who builds drying and inspection time into their workflow.
Frequently Asked Questions (FAQs)
Can paintable caulk be used for patching drywall?
Paintable caulk can seal small gaps or joints but is not ideal for patching walls before painting. It remains flexible and doesn’t sand well, making it unsuitable for creating a smooth, flat surface. For proper wall surface preparation, joint compound or spackle should be used instead.
What’s the best lighting to inspect walls after patching?
Use a bright handheld work light or angle a lamp along the wall to reveal imperfections. Glancing light makes it easier to spot dips, ridges, and uneven patches. This extra step is essential after sanding patched walls before painting to catch anything that needs additional smoothing.
Is it okay to paint over textured drywall without patching?
Painting over textured drywall is possible, but any damage or rough patches still need attention. Texture doesn’t hide flaws—it can make them more noticeable. Wall repair before painting is still necessary to fix dents or holes before applying a fresh coat.
How do humidity levels affect drywall patching?
High humidity slows the drying time of joint compound and primer, which can delay the project. This is especially important when patching walls before painting in areas like bathrooms or basements. Allowing full dry time ensures smoother wall surface preparation and prevents bubbling.
Should outlet covers and switch plates be removed during prep?
Yes, removing outlet covers gives better access to edges and prevents paint buildup around them. It also allows for smoother sanding patched walls before painting and avoids missed spots near electrical fixtures. Professional wall repair before painting always includes removing or masking these areas carefully.
Get Flawless Results with Southbury House Painting Experts
Bring new life to your walls with Southbury House Painting Experts—the trusted choice for professional prep and paint in Southbury, CT. Whether it’s patching walls before painting, smoothing walls before applying paint, or handling detailed wall surface preparation, our crew gets every step right. With a focus on quality craftsmanship and long-lasting finishes, we take pride in delivering smooth, clean results that stand up over time.
Contact our team today and see how expert prep work makes all the difference.