Transform Your Home with a Fresh Coat House Painting Tips & Tricks

Transform Your Home with a Fresh Coat: House Painting Tips & Tricks

A fresh coat of paint enhances a home’s appeal and protects surfaces. While DIY projects can be rewarding, house painting services ensure precision and durability. Skilled professional house painters handle prep, color selection, and application, avoiding common mistakes. Whether painting independently or hiring home painting contractors, this guide offers expert tips for a flawless finish.

Here are five house painting tips and tricks when transforming your home with a fresh coat.

Table of Contents

Key Takeaways

Choosing the right paint type, finish, and quality ensures durability and a professional look for any residential painting project.

Proper wall preparation, including cleaning, sanding, and priming, prevents peeling and ensures smooth application.

High-quality brushes, rollers, and tools create even coverage and eliminate streaks, drips, and visible brush marks.

Using the right painting techniques, such as keeping a wet edge and applying thin coats, results in a flawless, factory-like finish.

Allowing paint to dry and cure properly prevents smudging, peeling, and premature wear over time.

Fixing common painting mistakes, like drips and uneven coverage, requires light sanding, touch-ups, and careful blending.

Hiring professional house painters from a trusted painting company near me ensures precision, efficiency, and long-lasting results.

1. Choose the Right Paint for Lasting Results

Selecting the right paint is crucial for durability, aesthetics, and ease of maintenance. The wrong choice can lead to peeling, fading, or an uneven finish, requiring frequent touch-ups. Professional house painters recommend considering the paint type, finish, and environmental factors before starting any residential painting project.

Why Paint Type Matters

  • Different Surfaces Require Different Paints: Interior walls need latex-based paint for easy cleanup, while oil-based paint works better on trim and doors due to its durability. For exterior projects, home painting contractors suggest using weather-resistant formulas that withstand sun exposure and moisture.
  • Finish Affects Durability and Maintenance: Matte finishes hide imperfections but scuff easily, making them best for low-traffic areas like bedrooms. Semi-gloss and satin finishes are easier to clean, making them ideal for kitchens, bathrooms, and trim.
  • Eco-Friendly Options Improve Indoor Air Quality: Low-VOC and zero-VOC paints reduce harmful fumes, making them safer for homes with children and pets. Many house painting services offer these environmentally friendly choices without sacrificing quality.

How to Choose the Best Paint

  • Test Samples Before Committing: Since colors appear differently under various lighting conditions, testing small wall patches ensures the right choice, while a color wheel helps create a balanced palette, whether monochromatic, complementary, or analogous. A trusted painting company near me recommends checking samples in both natural and artificial light before finalizing a shade.
  • Consider Room Function and Exposure: High-moisture areas like bathrooms and kitchens need mold-resistant paints, while high-traffic spaces benefit from scrubbable finishes. Professional house painters suggest stain-resistant paints for homes with kids or pets.
  • Factor in Long-Term Maintenance: Dark colors fade faster in direct sunlight, making lighter shades a better choice for sun-exposed areas. Investing in high-quality house painting services ensures a professional application that resists chipping and fading over time.

2. Prepare Walls for a Smooth, Lasting Finish

Skipping wall preparation leads to uneven application, peeling, and poor adhesion. Proper prep work ensures that paint glides on smoothly and stays vibrant for years. Professional house painters stress that taking time to prep surfaces makes a noticeable difference in the final result.

Why Preparation Matters

  • Dirt and Grease Prevent Proper Adhesion: Walls accumulate dust, grease, and grime, which can cause paint to peel or bubble. House painting services recommend cleaning walls with a mild soap solution or a degreaser for kitchens and high-touch areas.
  • Cracks and Holes Affect the Final Look: Even the best paint won’t hide surface imperfections. Filling cracks and nail holes with spackle and sanding them smooth ensures a flawless finish, as advised by home painting contractors.
  • Primer Improves Coverage and Durability: Applying primer helps paint adhere better, evens out color variations, and enhances durability. A trusted painting company near me recommends using stain-blocking primer for previously painted dark walls or high-moisture areas.

How to Prepare Walls Correctly

  • Use Painter’s Tape for Sharp Edges: Taping off baseboards, trim, and ceilings prevents messy lines. Professional house painters press tape firmly to create clean, professional-looking edges.
  • Sand Glossy Surfaces for Better Adhesion: Paint doesn’t stick well to glossy finishes. Lightly sanding shiny surfaces with fine-grit sandpaper ensures the new coat bonds properly, according to house painting services.
  • Remove Dust Before Painting: Sanding creates dust that ruins smooth application. Wiping walls with a damp microfiber cloth or a tack cloth, as suggested by home painting contractors, prevents debris from getting trapped in the paint.

Brush and Paint Roller besides 3 Color Paint Can

3. Use the Right Tools for a Professional Finish

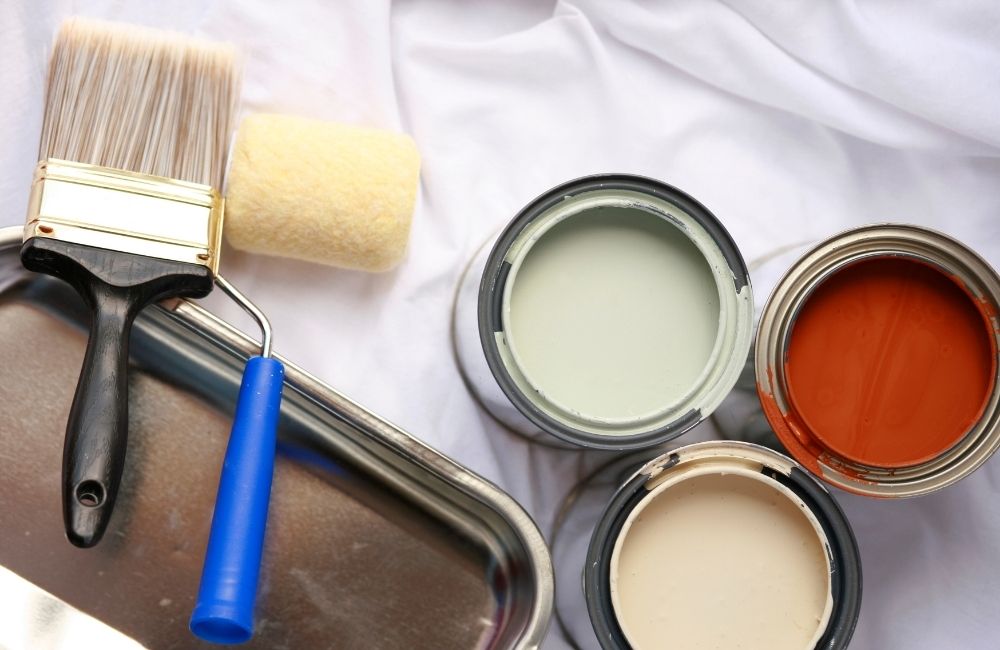
The right tools make painting easier, reduce streaks, and improve efficiency. Low-quality rollers and brushes lead to uneven coverage and visible brush marks. Professional house painters always use high-grade tools to achieve a flawless look.

Why Tools Make a Difference

  • Cheap Brushes Leave Streaks and Shed Bristles: Low-quality brushes don’t hold paint well and leave behind visible lines. House painting services recommend synthetic bristle brushes for latex paint and natural bristles for oil-based paint.
  • Roller Thickness Affects Coverage: Thicker nap rollers hold more paint and work well on textured walls, while thinner ones create a smooth finish on flat surfaces. A trusted painting company near me suggests using a 3/8-inch nap for most interior walls.
  • Extension Poles Improve Efficiency and Safety: Ladders aren’t always practical for high walls and ceilings. Home painting contractors use extension poles to roll paint smoothly without leaving uneven spots.

How to Use Painting Tools Correctly

  • Load Brushes and Rollers Properly: Dipping a brush too deep causes drips, while overloading a roller leads to uneven application. Professional house painters dip only one-third of the brush in paint and roll excess paint off before applying it to the wall.
  • Use a Paint Grid Instead of a Tray: Rolling paint on a grid inside a bucket removes excess paint better than a tray. House painting services find this method reduces spills and ensures even distribution.
  • Hold Brushes at the Right Angle: Angling the brush slightly while cutting in creates cleaner lines. Home painting contractors recommend using steady, smooth strokes instead of dabbing or pressing too hard.

4. Master the Right Painting Techniques

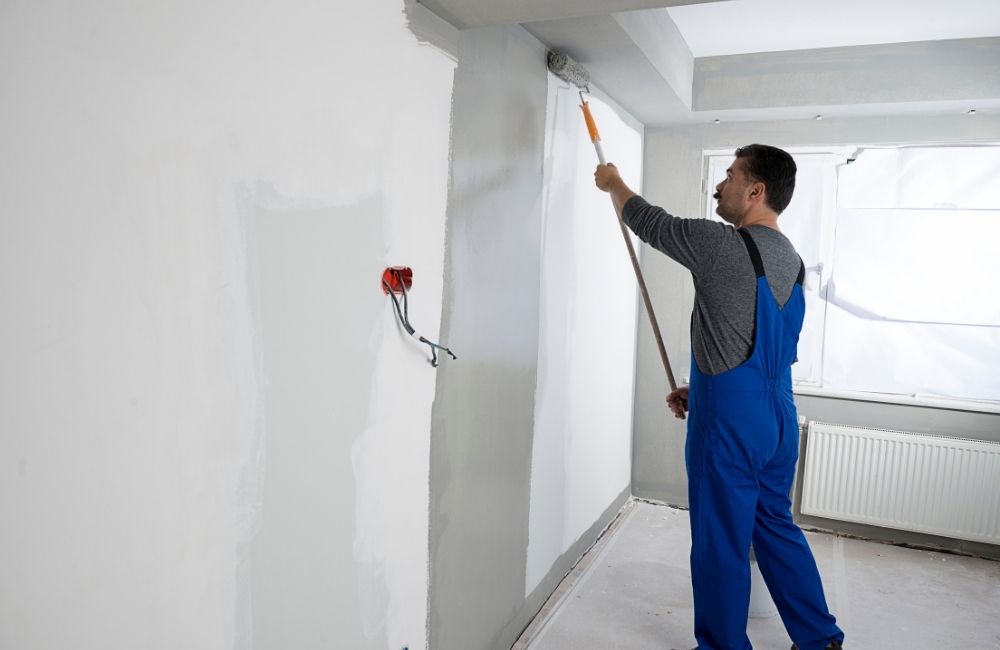
Even with the best tools and high-quality paint, poor technique can ruin the finish. Streaks, roller marks, and uneven coverage often come from improper application. Professional house painters follow proven methods to achieve smooth, consistent results.

Why Technique Matters

  • Thick Layers Take Longer to Dry and Cause Drips: Applying too much paint at once leads to sagging and uneven texture. House painting services recommend using multiple thin coats for a smooth, even finish.
  • Rolling in One Direction Prevents Streaks: Back-and-forth rolling creates visible lines and patchy spots. A trusted painting company near me advises rolling in a single direction—either up and down or side to side—for a seamless look.
  • Blending Brush and Roller Sections Creates Consistency: Cutting in edges before rolling sometimes leaves noticeable differences in texture. Home painting contractors use a dry roller to blend brush strokes with the rest of the wall.

How to Paint Like a Pro

  • Keep a Wet Edge to Avoid Lap Marks: Painting over a partially dried section leaves streaks. Professional house painters suggest working in manageable sections and overlapping each stroke while the paint is still wet.
  • Feather Out Edges for a Seamless Finish: Stopping mid-wall or applying too much pressure leaves visible lines. House painting services recommend lightening pressure at the end of each stroke to create a soft, blended transition.
  • Use Long, Even Strokes: Short, choppy strokes create patchy results. Home painting contractors emphasize using smooth, controlled motions for even distribution.

5. Let Paint Dry and Cure Properly

Rushing the drying process leads to smudges, streaks, and premature wear. Proper drying and curing time allows the paint to harden for a durable, long-lasting finish. Professional house painters always allow adequate drying before applying additional coats or moving furniture.

Why Drying Time Is Important

  • Touching Paint Too Soon Leaves Fingerprints and Smudges: Even when paint feels dry, it may still be soft underneath. House painting services recommend waiting at least two hours between coats and 24 hours before handling surfaces.
  • Humidity and Temperature Affect Drying Time: High humidity slows down drying, while extreme heat causes uneven curing. A trusted painting company suggests painting in moderate temperatures and using fans to improve air circulation.
  • Furniture and Decor Can Damage Fresh Paint: Moving items back too soon can leave marks or indentations. Home painting contractors advise waiting at least 48 hours before rehanging wall art or pushing furniture against newly painted walls.

How to Ensure Proper Drying

  • Use a Fan or Dehumidifier in Humid Conditions: Moisture in the air slows drying and can cause paint to remain tacky. Professional house painters use fans or open windows to speed up the process in humid climates.
  • Avoid Washing Walls for at Least Two Weeks: Freshly painted surfaces need time to fully cure before cleaning. House painting services suggest waiting at least 14 days before wiping walls with a damp cloth.
  • Check for Full Curing Before Heavy Use: Paint may take up to 30 days to cure completely, especially on high-touch areas like cabinets or doors. Home painting contractors recommend avoiding excessive handling or scrubbing until the paint has fully hardened.

How to Fix Common Painting Mistakes Without Repainting Everything

Even with the best preparation, mistakes happen during residential painting projects. Drips, streaks, uneven coverage, and tape mishaps can make a freshly painted surface look unprofessional. Instead of starting over, these simple fixes can help salvage the job and achieve a flawless finish—an essential skill in a growing industry projected to reach $29.6 billion by 2033.

1. Fixing Paint Drips and Runs

Drips occur when too much paint is applied at once or when excess paint is left on the brush or roller. To fix dried drips, sand the area gently with fine-grit sandpaper until smooth, then repaint with a light touch. Home painting contractors recommend checking walls from different angles while the paint is wet to spot drips early and smooth them out before they dry.

2. Blending Roller Marks for an Even Finish

Roller marks happen when the paint dries too quickly or when uneven pressure is applied. To fix them, apply another thin coat using light, even strokes and keep a “wet edge” by overlapping strokes before the paint dries. House painting services suggest using high-quality rollers and maintaining consistent pressure to prevent streaks.

3. Removing Paint Bubbles and Blisters

Bubbles form when paint is applied to a damp or dirty surface or when the second coat goes on too soon. Scrape off the bubbles, sand the area smooth, and repaint with thin, even coats. Professional house painters advise waiting until the first coat is completely dry before applying the next to avoid trapping moisture.

4. Correcting Uneven Paint Coverage

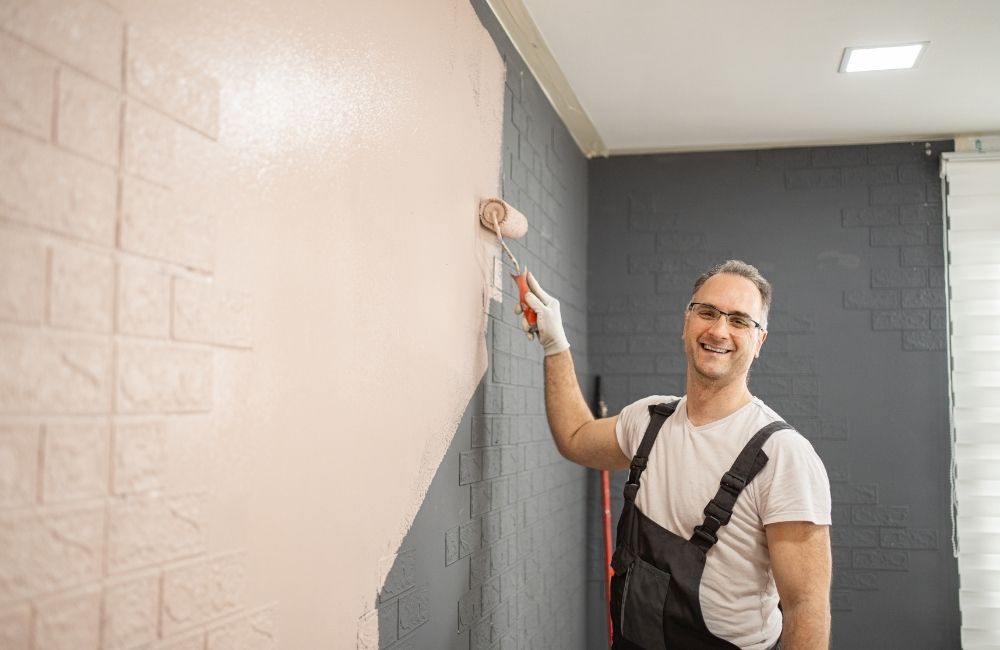
Uneven coverage often occurs when too little paint is applied or when different sections dry at different rates. To fix this, apply a second coat with a properly loaded roller, using long, overlapping strokes. A reliable painting company suggests working in small sections and maintaining consistent pressure for a uniform finish.

5. Preventing Peeling Paint from Painter’s Tape

Painter’s tape can pull off fresh paint if left on too long or removed incorrectly. To fix peeled spots, sand the edges smooth, touch up with a small brush, and feather the paint outward for a seamless blend. House painting services recommend removing tape at a 45-degree angle while the paint is still slightly wet to avoid peeling.

How to Paint Cabinets and Trim for a Smooth, Factory-Like Finish

Painting cabinets and trim requires a different approach than walls. These surfaces demand extra prep work, the right tools, and proper techniques to achieve a flawless, factory-like finish. Whether hiring house painting services or taking a DIY approach, following these steps ensures smooth, durable results that look professionally done.

1. Cleaning and Sanding for Better Adhesion

Cabinets and trim collect grease, dust, and grime, which prevent paint from sticking properly. Before painting, wipe surfaces with a degreaser or a mixture of warm water and dish soap, then rinse thoroughly. Professional house painters recommend sanding with fine-grit sandpaper (120-150 grit) to create a smooth surface and improve paint adhesion.

2. Using High-Quality Primer to Prevent Stains and Peeling

A strong primer helps block stains, seals porous surfaces, and ensures paint adheres evenly. Oil-based or shellac-based primers work best for cabinets, while a bonding primer is ideal for glossy trim. Home painting contractors suggest applying primer with a brush for edges and a foam roller for flat areas to achieve a smooth, even base.

3. Choosing the Right Paint for a Hard, Durable Finish

Cabinets and trim need durable, scrubbable paint that resists chipping and moisture damage. Satin, semi-gloss, or high-gloss enamel paints provide a smooth, factory-like finish and are easy to clean. House painting services recommend using water-based alkyd or acrylic-urethane paints for a professional-quality result without strong fumes.

4. Applying Thin Coats for a Streak-Free Finish

Thick paint layers create drips and uneven texture, especially on detailed trim and cabinet doors. Instead, apply multiple thin coats, allowing each layer to dry completely before adding the next. A trusted painting company suggests using a high-density foam roller or a high-quality brush to minimize brush strokes and roller marks.

5. Letting Paint Cure Before Reinstalling Hardware

Even when paint feels dry, it needs time to fully cure and harden for durability. Wait at least 24 hours before handling cabinets and trim and a full week before reinstalling hardware or cleaning. Professional house painters advise keeping doors and drawers slightly open during curing to prevent sticking.

Frequently Asked Questions (FAQs)

What is the best time of year to paint a house?

The best time for residential painting depends on the weather and humidity levels. For exterior painting, late spring through early fall is ideal because temperatures are moderate, and there’s less risk of rain interfering with drying. Interior painting can be done year-round, but professional house painters recommend choosing a time when windows can be opened for ventilation. A trusted painting company near me can advise on the best season to paint based on local climate conditions.

How long does house paint typically last before needing a new coat?

The longevity of a paint job depends on the surface, paint quality, and environmental conditions. Interior walls usually need repainting every 5-7 years, while high-traffic areas may require touch-ups sooner. Exterior paint lasts 7-10 years but may fade or peel faster due to sun exposure, moisture, and weather changes. House painting services use high-quality, weather-resistant paints to extend the lifespan of both interior and exterior finishes.

How can I reduce paint fumes and odors during and after painting?

Using low-VOC or zero-VOC paints significantly reduces strong paint odors and improves indoor air quality. Keeping windows open, using fans, and placing bowls of baking soda or activated charcoal in the room helps absorb lingering smells. Home painting contractors recommend ventilating the space for at least 24-48 hours after painting for the best air circulation. A trusted painting company near me can provide eco-friendly paint options that minimize fumes while still delivering excellent coverage.

What should be done if mold or mildew is found on walls before painting?

Mold and mildew must be completely removed before starting a residential painting project to prevent future growth. Cleaning the affected area with a mix of bleach and water or a commercial mold remover kills spores and stops spreading. Professional house painters apply a mold-resistant primer to prevent regrowth and improve paint adhesion. House painting services often recommend moisture-resistant paint for bathrooms, basements, and other high-humidity areas.

How can I protect floors and furniture when painting a room?

Covering floors with drop cloths and taping plastic sheeting over furniture prevents paint splatters and spills. Moving furniture to the center of the room and covering it with lightweight plastic keeps it protected while allowing easy access to walls. Home painting contractors also suggest using painter’s tape to secure edges along baseboards, door frames, and windows for a clean finish. A reliable painting company takes extra precautions to ensure all surfaces remain spotless throughout the painting process.

Contractor painting walls while smiling

Transform Your Home with Southbury House Painting Experts!

A fresh coat of paint can make all the difference, and Southbury House Painting Experts delivers flawless, long-lasting results for homes in Southbury, CT. Whether it’s reviving interiors with modern hues or protecting exteriors from the elements, their skilled professional house painters ensure precision, durability, and a smooth finish.

Don’t settle for less—trust a painting company that puts craftsmanship and customer satisfaction first. Contact Southbury House Painting Experts today and let them bring your vision to life with expert house painting services in Southbury, CT!